


14. Everything is now ready for the 3rd dimension! Open up OziExplorer Trial again and select our map. Choose "File", "Load From File", "Load Map File", and select your calibrated map (mine is St. George 21G02). If everything worked properly, you should now see a small box showing the elevation at the point where your mouse cursor is located.
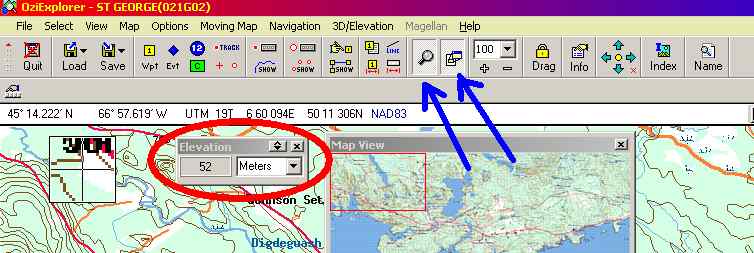
If you find the magnified view and map view pop-ups annoying, you can shut them off by pressing the buttons shown by the blue arrows above. To prevent them from appearing every time you open the program, click on "File", then "Configuration"....
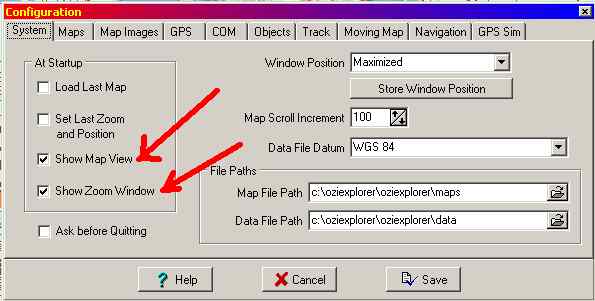
...and unselect these 2 checkboxes. Now click the "Save" button.
15. Let's (finally!!!) make a 3D map. Click on "3D/Elevation" on the top toolbar, then "3D Map Control"...the control box will pop-up on your map. To move the box around on your map so it doesn't block an area of interest, click and hold your mouse on the title bar (where it says "3D Map Control). Now move it where you want then let your mouse button go.
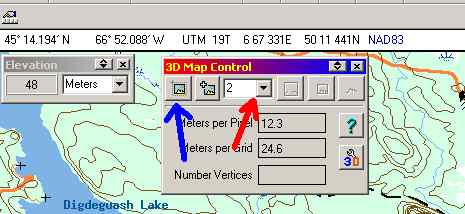
Click the button indicated by the red arrow above and select "2" as shown; this will provide the best detail on our map but will be the slowest to draw - choose a higher number if you have a really slow computer. Next click the button shown by the blue arrow. Your mouse pointer will turn into a crosshair...use it to create a box around the part of the map you want to see in 3D by clicking the mouse on one corner, dragging the box, then releasing the mouse button.
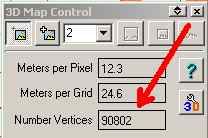
IMPORTANT! Do not draw too large a box. If you exceed 100,000 vertices the demo version we are using will not draw the map correctly.