


3D MAP TUTORIAL
CREATE YOUR OWN FREE 3D TOPOGRAPHIC (TOPO) MAPS AND SATELLITE IMAGES
 These
3D map images were created using software and files that are all available free
on the internet. Putting a map or satellite photo into the third dimension
really gives you a great advantage in visualizing the information...and it just
looks cool! Learn how to do this by following these steps. It's not
complicated but it is time consuming. And a high-speed net connection is a "must"...but
if you're patient, it can be done on a dial-up.
These
3D map images were created using software and files that are all available free
on the internet. Putting a map or satellite photo into the third dimension
really gives you a great advantage in visualizing the information...and it just
looks cool! Learn how to do this by following these steps. It's not
complicated but it is time consuming. And a high-speed net connection is a "must"...but
if you're patient, it can be done on a dial-up.
1. First download OziExplorer. It's available as a free trial version; just follow the link under "software" on the homepage.
2. Install OziExplorer on your computer. Put it in a directory such as C:\OziExplorer. Let the installation create a desktop icon for the TRIAL version - you MUST use the trial for this to work. The shareware version will be created as well, but it does not provide a means to display the images we are going to use.
3. Now you can download the 3D add-on from the OziExplorer site. Follow the link to OziExplorer3D under "software".
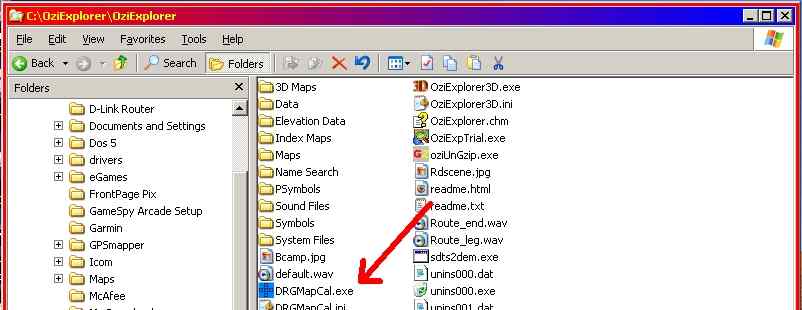
4. Copy the downloaded 3D program setup file to your OziExplorer directory (Our example would be in the directory C:\OziExplorer\OziExplorer). Then run the setup program.
5. Start up OziExplorer TRIAL using the icon created by the setup program (it should be on your desktop). Make sure that the 3D option is shown on the toolbar. If it's missing something went wrong with the installation. Try the above steps again.
6. We are going to use Toporama maps and images exclusively in this tutorial. OziExplorer needs to know the exact location of a number of points on any file used - this is termed "calibration" and is crucial for the correct display of bearings and elevation data. Calibration can be tedious but luckily Dave Patton has written a wonderful little program that totally automates this process. Download DRGMapCal here. You'll need WinZip to extract the program. You can place DRGMapCal in any directory you wish; I put mine in the OziExplorer folder just to keep everything in one place.
7. Time to visit Toporama to get a map. Enter the site then start "zooming in" to your area of interest on the big Canada map.
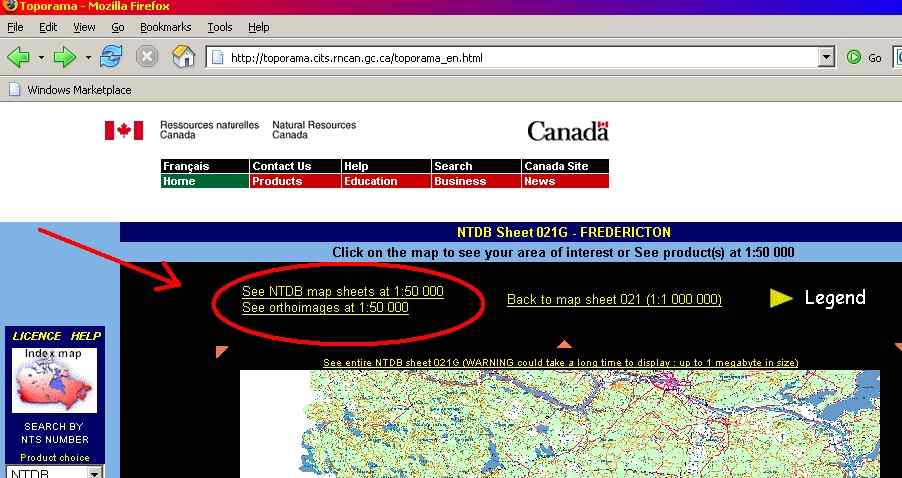
As you zoom in, pay attention for the above noted text. We want 1:50000 scale as it provides the best detail. When you see this, click on it and your area map will be covered with the grid designations for individual maps.
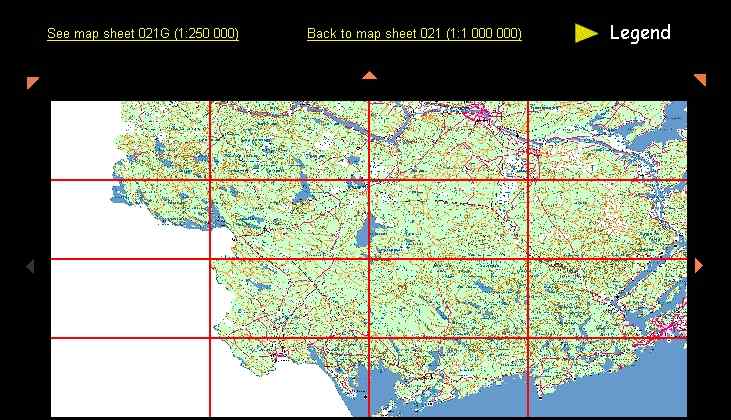
Click on the map you want from the grids. Notice the small line of text at the top of the map...

This will download the whole map to your browser - it'll take a LONG TIME if you are on dial-up. Once it's displayed, right-click on the map and use the "Save Image As..." option to copy it to your computer.
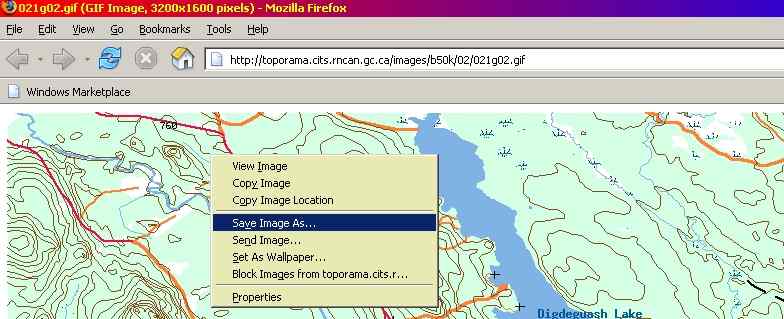
Create a directory such as C:\MapImages to save the GIF file. We'll have to convert the image with DRGMapCal before it can be used in OziExplorer.
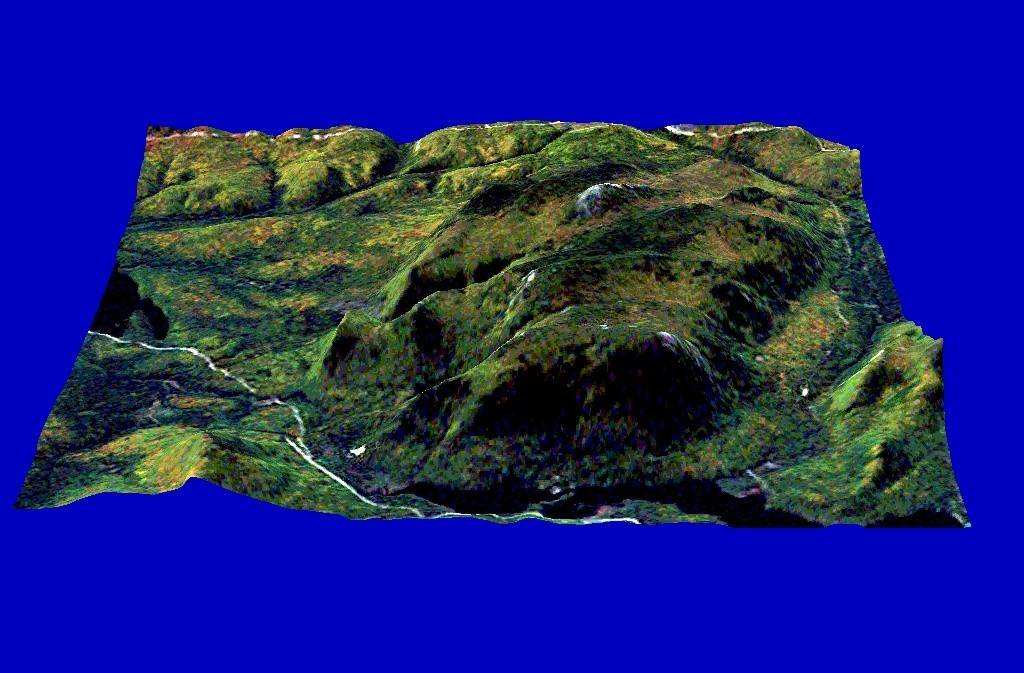
8. If you want a satellite image instead of a map of the same region, just select the "see orthoimages..." option.
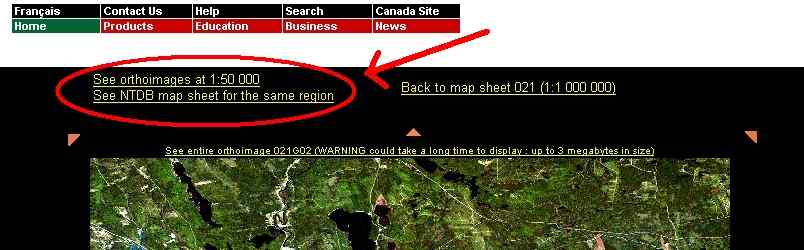
Orthoimages are composites created from Landsat imagery of the exact same areas covered by a given mapsheet. They provide a much more up-to-date look at roads and land features.
9. Lets calibrate our new downloaded image so OziExplorer can use it. Go to the folder where you placed DRGMapCal and start the program. It may be a good idea to create a desktop shortcut to this file.
Select the "Toporama" option once you pass the main screen. On the "Input" box select the "1:50000" option and browse to the directory where you placed the downloaded image. On the "Output" box browse to your "Maps" folder on your OziExplorer folder. Then press the "Generate map calibration files" button.
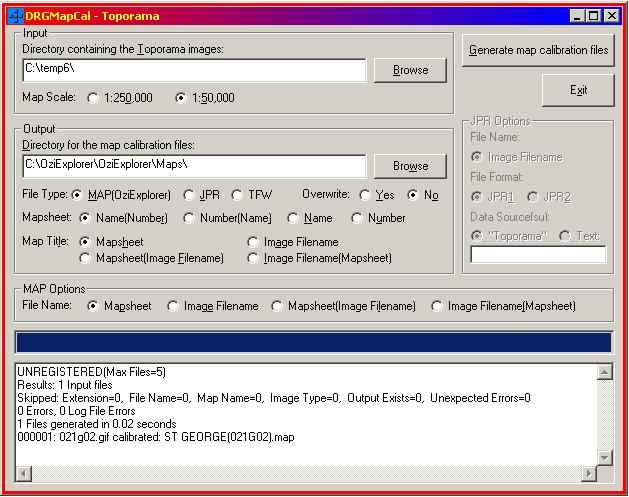
Once the file is generated you'll see a text-box showing if the file was created properly. If all goes well, you'll see something like the above. Please note that you can generate multiple MAP files if you have more than one image in your "Input" directory. The shareware version of DRGMapCal will calibrate 5 images at once. IMPORTANT: The original GIF file you downloaded from Toporama MUST be placed in the OziExplorer "Maps" directory after you generate the calibration. Otherwise OziExplorer won't have a picture to display.
10. To check our progress let's open our new MAP file in OziExplorer. We'll get our digital elevation data shortly, but it's best to make sure everything works up to this point.

Open up OziExplorer TRIAL (remember?), click on "File", then "Load from File", then "Load Map File". Next select the new map you just created.
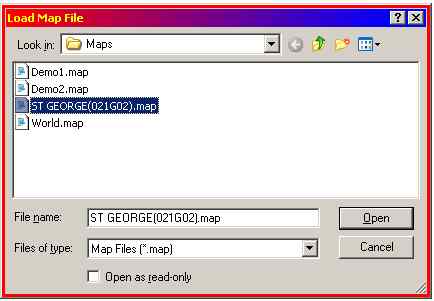
Click on "Open" and you'll see your calibrated map. As you move the mouse over the map you'll see the bearing display changing. This means everything worked!

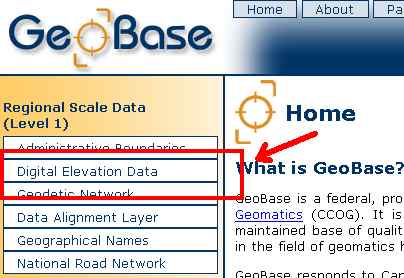
11. The next thing needed is digital elevation data for our map. This will come from the GeoBase website. Most populated areas of Canada are covered in 1:50000 scale, however there are gaps - see here for your province. Enter the site and click on the "Digital Elevation Data" link.
From here select the "Download..." option.

Select the region and scale you want...for our example it's New Brunswick at 1:50000.

Now choose the mapsheet that has the same name as your OziExplorer MAP file.
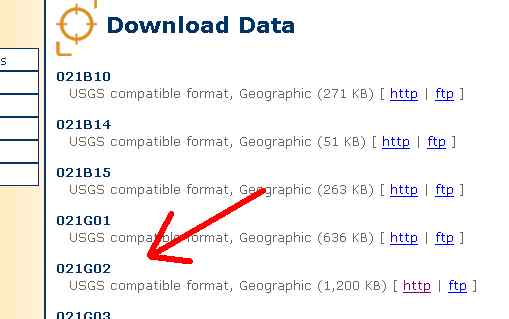
Click on "http" and download the Zip file to your computer after agreeing to the license. Make sure you place it in a temporary directory such as C:\elevation. Even though this is a Zip file, we need to use a special utility that comes with OziExplorer to convert the file to a usable format.
DO NOT USE WINZIP ON THESE FILES!
12. OziExplorer needs to be set up to use the elevation data. First, create a directory to hold the data files.
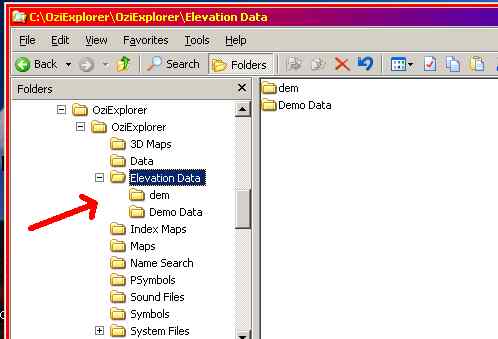
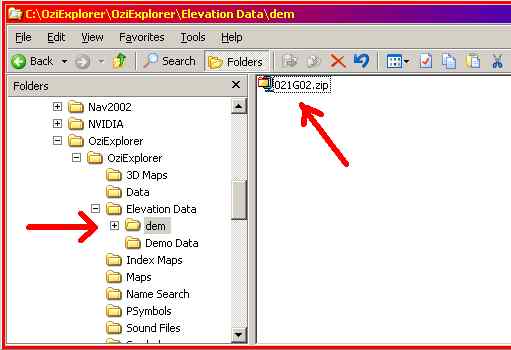
Navigate to the OziExplorer directory in windows and click on the "Elevation Data" folder. Then click on "File", then "New", then "Folder". I named mine "dem". Make sure it appears in the "Elevation Data" folder.
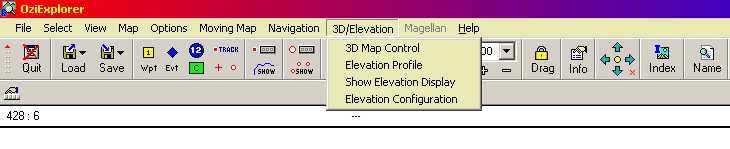
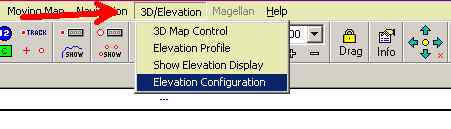
Start up OziExplorer TRIAL and click on "3D/Elevation" on the toolbar. Click on "Elevation Configuration".
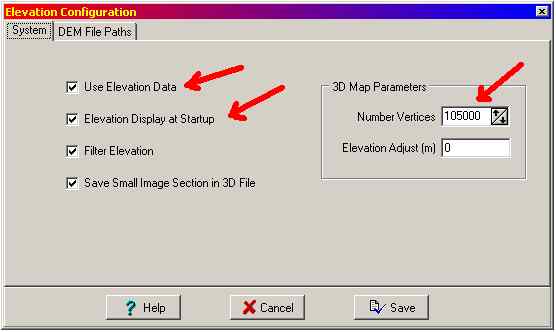
Set the following parameters on the box that appears. Then press on the "DEM File Paths" tab.
Set up the box to match this picture below. Type in your new directory name in the "USA DEM 24K" field. Make sure this is the only directory checked as "Active".
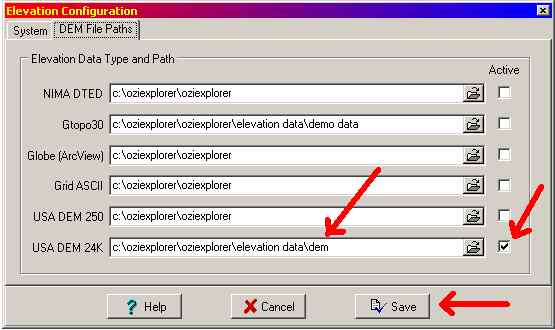
Finally, click on "Save". Close OziExplorer Trial for now.
13. Back to the digital elevation data. Move the downloaded file from GeoBase to your newly created DEM folder.
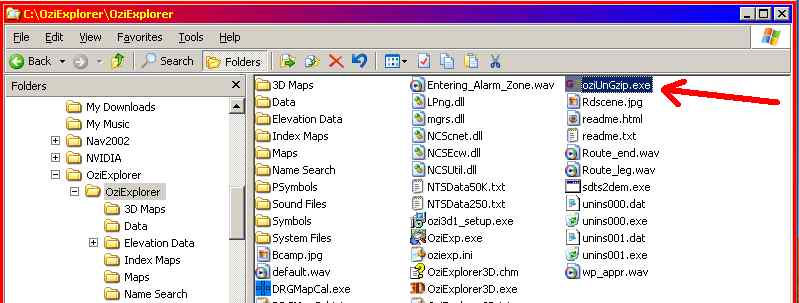
Next navigate to your OziExplorer directory (mine is under C:\OziExplorer\OziExplorer) and start the program called "oziUnGzip.exe".
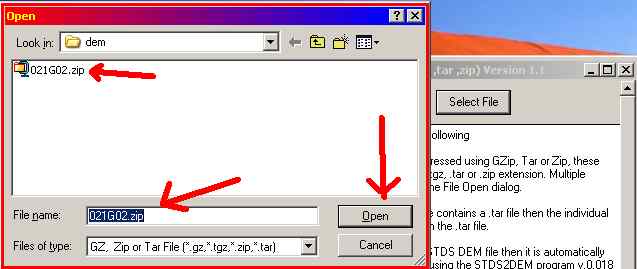
Click on the "Select File" button and navigate to the DEM folder in OziExplorer (mine is in path C:\OziExplorer\OziExplorer\Elevation Data\dem) and select the Zipped file (021G02.zip in our example). Then press the "Open" button.
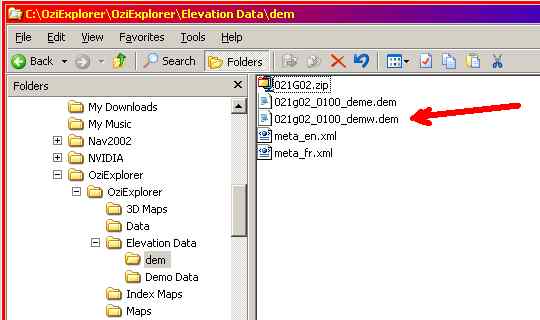
The program will run and create the necessary files. A "Done" button will pop up when finished. Close the program.
If we check our dem folder now, we can see the files.
14. Everything is now ready for the 3rd dimension! Open up OziExplorer Trial again and select our map. Choose "File", "Load From File", "Load Map File", and select your calibrated map (mine is St. George 21G02). If everything worked properly, you should now see a small box showing the elevation at the point where your mouse cursor is located.
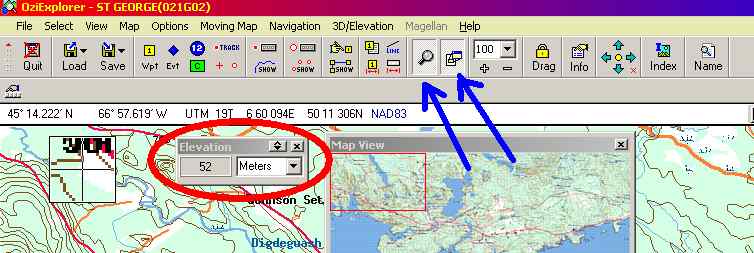
If you find the magnified view and map view pop-ups annoying, you can shut them off by pressing the buttons shown by the blue arrows above. To prevent them from appearing every time you open the program, click on "File", then "Configuration"....
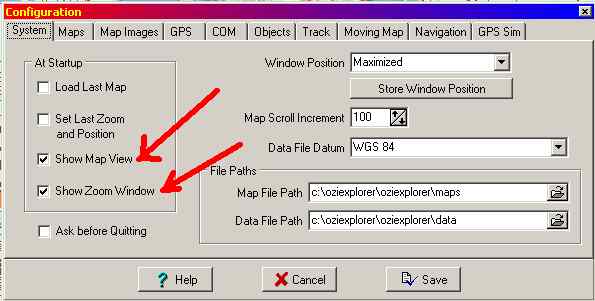
...and unselect these 2 checkboxes. Now click the "Save" button.
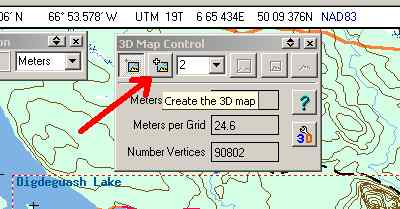
15. Let's (finally!!!) make a 3D map. Click on "3D/Elevation" on the top toolbar, then "3D Map Control"...the control box will pop-up on your map. To move the box around on your map so it doesn't block an area of interest, click and hold your mouse on the title bar (where it says "3D Map Control). Now move it where you want then let your mouse button go.
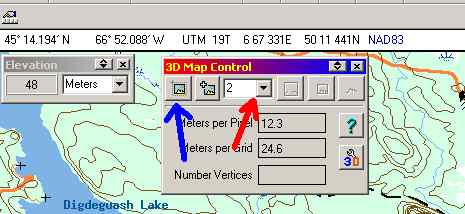
Click the button indicated by the red arrow above and select "2" as shown; this will provide the best detail on our map but will be the slowest to draw - choose a higher number if you have a really slow computer. Next click the button shown by the blue arrow. Your mouse pointer will turn into a crosshair...use it to create a box around the part of the map you want to see in 3D by clicking the mouse on one corner, dragging the box, then releasing the mouse button.
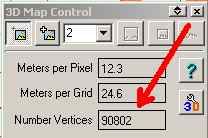
IMPORTANT! Do not draw too large a box. If you exceed 100,000 vertices the demo version we are using will not draw the map correctly.
16. To create the 3D map, press the 2nd button on the left of the "3D Map Control" box.
OziExplorer will now create the map and automatically open the 3D add-on. THIS MAY TAKE A FEW MINUTES IF YOU HAVE A SLOW COMPUTER! There will be a few "nag" screens that appear when you first open the 3D application; just click on the check boxes to keep them from appearing again.
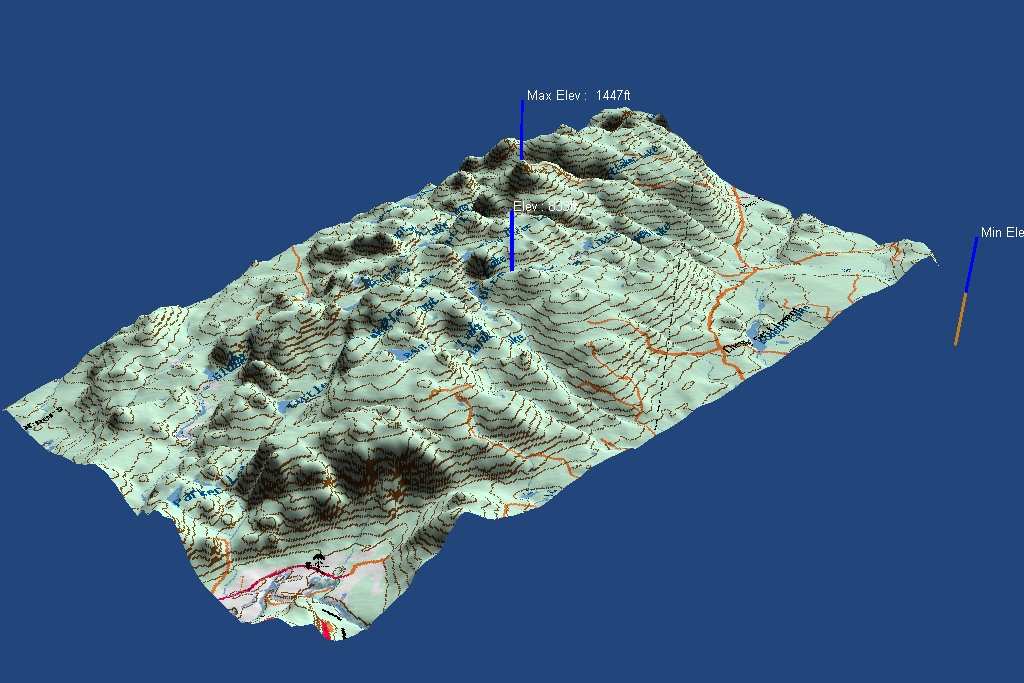
17. You should now see the following or something like it.

If you can't see the "Map control" press the button shown by the red arrow. If the map control is just a narrow title bar press the "^" button next to the "x" button on the bar. To see the map image larger, press the button shown by the blue arrow. To move the map control around, just grab the title bar with your mouse by clicking on it and drag it where you want then release. I like to exaggerate the height factor of the maps I create to make things more visible. By pressing on the buttons shown by the yellow arrows features will get larger or smaller...a setting of 3.5 usually is pretty good for the relatively flat areas around here.

To change the angle or rotation of the map, place your mouse by the image and left-click and hold. The map will turn into a wireframe (above) - move your mouse around while holding the left button until it's where you want, then release. To move the image left or right or forward or reverse, right-click your mouse and hold then move.
Play around with the various buttons on the toolbar to see what they do. You can also save your map by clicking on "File", "Save 3D Map". When you are finished, close the 3D program.
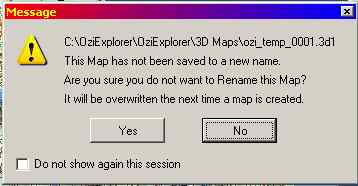
You'll see the above warning screen. Just click "Yes" if you don't want to save the 3D map. Ozi3D will close and you will return to OziExplorer.
I hope you have found this tutorial informative and useful. This is by no means a complete review of all the features provided by OziExplorer. Using a GPS it is capable of moving-map displays, waypoint and track overlay on map images, and many more useful functions. Play around with the programs and if you like them, BUY THE FULL VERSION! Help support the efforts of the brilliant people who have given us these great products.
Ron Boyce, 2004

This work is licensed under a Creative Commons Attribution-NonCommercial-NoDerivs 2.5 License.