


11b. Select the region and scale you want...for our example it's New Brunswick at 1:50000.

Now choose the mapsheet that has the same name as your OziExplorer MAP file.
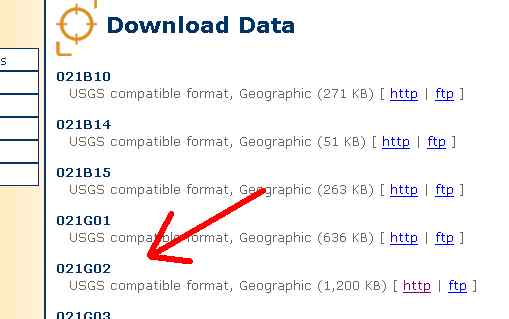
Click on "http" and download the Zip file to your computer after agreeing to the license. Make sure you place it in a temporary directory such as C:\elevation. Even though this is a Zip file, we need to use a special utility that comes with OziExplorer to convert the file to a usable format.
DO NOT USE WINZIP ON THESE FILES!
12. OziExplorer needs to be set up to use the elevation data. First, create a directory to hold the data files.
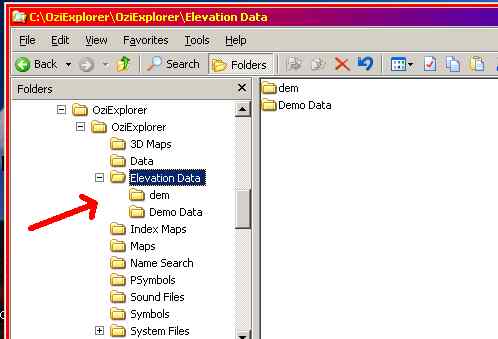
Navigate to the OziExplorer directory in windows and click on the "Elevation Data" folder. Then click on "File", then "New", then "Folder". I named mine "dem". Make sure it appears in the "Elevation Data" folder.
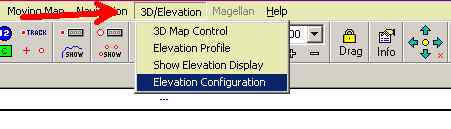
Start up OziExplorer TRIAL and click on "3D/Elevation" on the toolbar. Click on "Elevation Configuration".
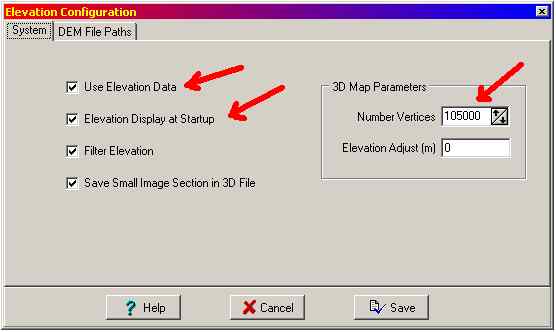
Set the following parameters on the box that appears. Then press on the "DEM File Paths" tab.
Set up the box to match this picture below. Type in your new directory name in the "USA DEM 24K" field. Make sure this is the only directory checked as "Active".
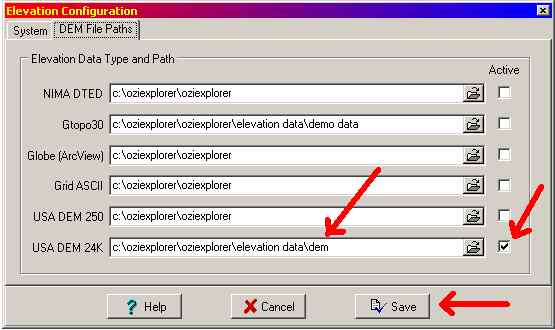
Finally, click on "Save". Close OziExplorer Trial for now.